
How To Make A Textured Crochet Cardigan ~ Free Crochet Cardigan Pattern

Follow this free textured crochet cardigan pattern to learn how to make the perfect light weight cardigan.
Read through my inspiration and design process, scroll down for the Free Pattern or purchase the Full Color coded Printable PDF Here!

Inspiration + Design
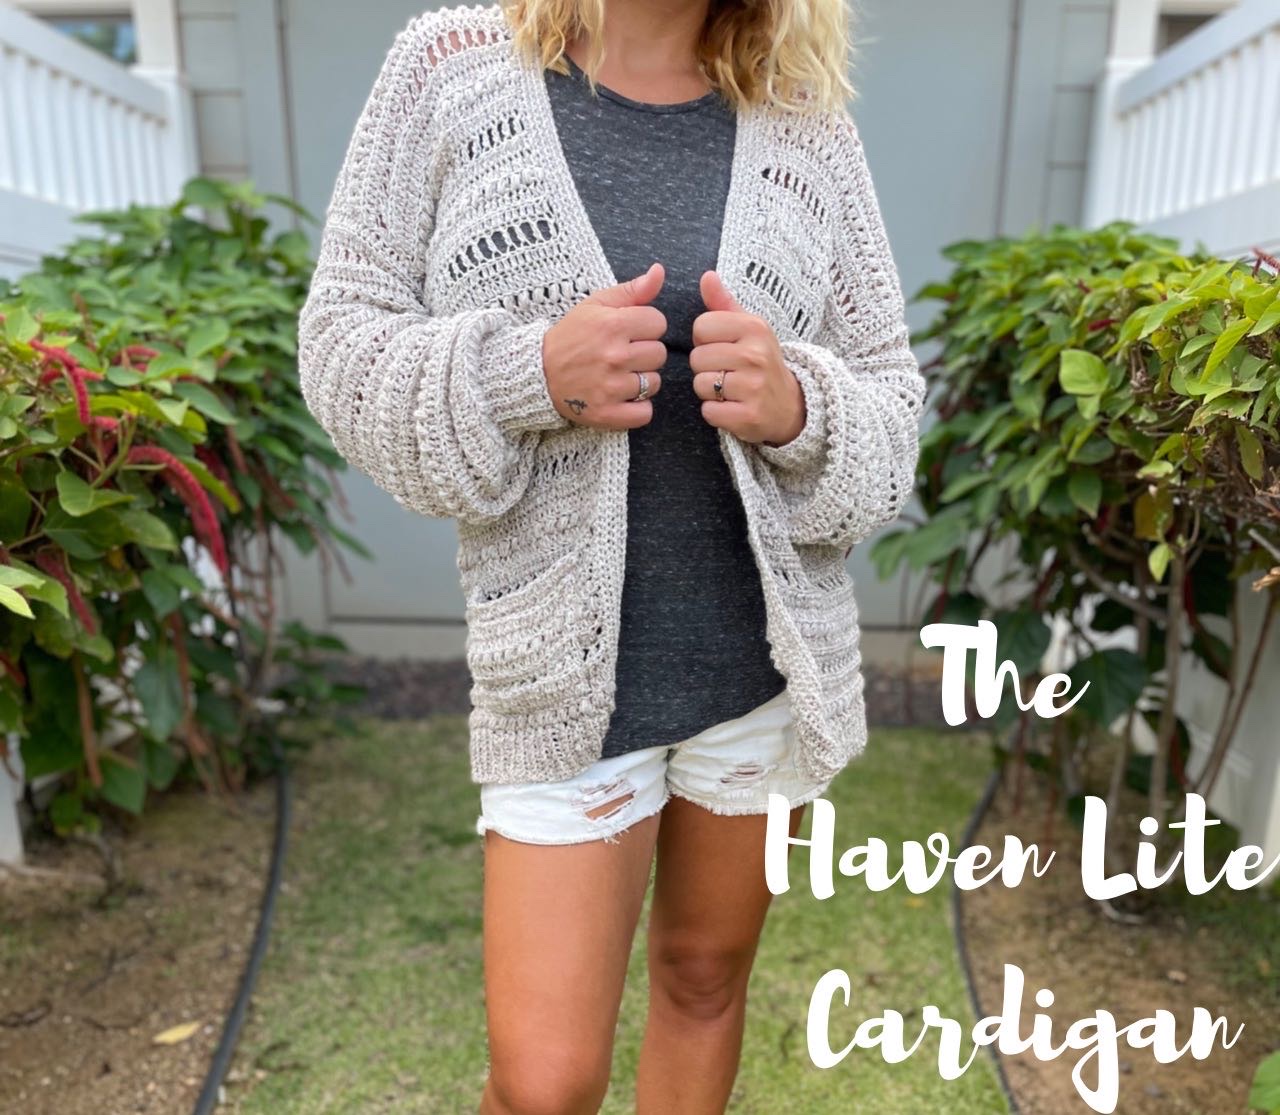
It’s here, the latest and greatest addition to the Haven Family, the Haven Lite! This textured crochet cardigan has been one of my most requested designs and I’m so thrilled to finally have it here on the blog!
The Haven Lite is exactly the same as the original Haven Cardigan, except it is made with light weight, Dk yarn instead of worsted weight. It’s perfect to wear for all seasons.

The Yarn
For this Textured Crochet Cardigan I used Yarn Bee Soft & Sleek Dk yarn, a category 3 anti-pilling yarn. This yarn was incredibly easy to work with and came in lots of beautiful colors. I highly recommend it! However, if anti-pilling acrylic yarn is not your cup of tea, you can use any other category 3 yarn that matches gauge.
Some suggestions are:
Lion Brand Coboo (one of my all time favorites)

Pattern Links
~Purchase the Color Coded Printable PDF on Etsy.
~Purchase the Color Coded Printable PDF on LoveCrafts.
~Save it to your Ravelry Here.

To Sum it up:
The Haven Lite is a light weight version of the original Haven Cardigan. It is a textured crochet cardigan that is made in one piece, with minimal seaming, therefore making a quick and easy project for beginners and experienced crocheters alike.
Yarn
Category 3 Light Weight Dk Yarn
Below is the approximate yardage for all sizes:
| Size | XS | S | M | L | XL | 2X | 3X | 4X | 5X |
| Approx Yds | 1250 | 1350 | 1450 | 1500 | 1700 | 1800 | 1950 | 2050 | 2100 |
Notions
-Size I (5.5 mm) Hook
-Yarn Needle
-Stitch Markers
Gauge
15 St and 8 rows in Extended Hdc in the BLO = 4”
Sizing
This Crochet Cardigan is made to be oversized with approximately 10” of positive ease. The measurements are Finished garment sizes. When choosing your size, find the bust measurement that equals approximately 10” larger than your actual bust measurement and make that size.
| Size | XS | S | M | L | XL | 2X | 3X | 4X | 5X |
| Bust | 39” | 43” | 47” | 51” | 55” | 59” | 63” | 67” | 71” |
| Length | 24.5” | 24.5” | 25” | 25” | 26” | 26” | 26.5” | 26.5” | 26.5” |
Abbreviations Used
St- Stitch
Ch- Chain
Yo- Yarn Over
Sl St- Slip Stitch
Sc- Single Crochet
Blo- Back Loop Only
Ehdc- Extended Half Double Crochet
Edc- Extended Double Crochet
Ps- Puff Stitch
Pattern Notes
-Pattern is worked from the bottom up in one piece and then divided for the armholes.
-Sleeves are worked in turned rounds. After you have joined with a slip stitch to end each round, Turn your work so that the next round is worked in the opposite direction.
-Sweater is worked in a 6 row repeat; The row repeat is as follows- Ehdc, Ehdc, Ps, Ehdc, Ehdc, Edc
-All stitches are worked in the Back loop only EXCEPT for the Ps rows which are worked through both loops
-Total Stitches are indicated between [ ].
-The sizing guide follows size XS(S, M, L, XL, 2X, 3X, 4X, 5X). E.g. “Sc 132(146, 162, 176, 190, 206, 220, 236, 250)” means Sc 132 for XS, Sc 146 for Small, Sc 162 for Medium, Sc 176 for Large, Sc 190 for XL, Sc 206 for 2X, Sc 220 for 3X, Sc 236 for 4X, Sc 250 for 5X. If there is only one number, it applies to all sizes.
Special Stitches
Extended Half Double Crochet
Yo, insert hook into the next St. Draw up a loop (3 loops on hook). Yo, pull through one loop. Yo, pull through remaining 3 loops.
Extended Double Crochet
Yo, insert hook into the next St. Draw up a loop (3 loops on hook). Yo, pull through one loop. Yo, pull through 2 loops. Yo, then pull through remaining 2 loops.
Puff Stitch
Yo, insert hook into next stitch and bring up a loop, you now have 3 loops on your hook. Yo, insert hook back into the same stitch, and bring up a loop, you now have 5 loops on your hook. Repeat this 2 more times (4 times total) ending with 9 loops on your hook. Yo, pull through all the loops, and finish with a Ch 1.

Textured Crochet Cardigan ~The Haven Lite Free Pattern
Starting with the ribbing.
Ch 11
Row 1: Sc in the 2nd Ch from the hook and in each Ch across. Turn. [10 Sc]
Row 2: Ch 1. Sc in the Blo of the first St and each St across. Turn. [10 Sc]
Repeat row 2 until you have a total of 132(146, 162, 176, 190, 206, 220, 236, 250) rows of ribbing.
Do not Fasten Off
You will now be working into the top of your ribbing.
Rotate ribbing to work across the row ends. Work 132(146, 162, 176, 190, 206, 220, 236, 250) Sc evenly across the top of ribbing. Turn. [132(146, 162, 176, 190, 206, 220, 236, 250) Sc]

Row 1: Ch 1. Skip the first St. (where the Ch 1 is) *Ps next, don’t forget your Ch 1 to secure the Ps after each one, skip the next St*. Repeat from * to * across ending with a Ps in the last St. Turn. [66(73, 81, 88, 95, 103, 110, 118, 125) Ps]
Row 2: Ch 2. Working in the Blo, Ehdc in the first St and each St across. Turn. [132(146, 162, 176, 190, 206, 220, 236, 250) Ehdc]
Row 3: Ch 2. Working in the Blo, Ehdc in the first St and each St across. Turn. [132(146, 162, 176, 190, 206, 220, 236, 250) Ehdc]
Row 4: Ch 3. Skip the first St (where the Ch 3 is). *Edc in the Blo of the next St, Ch 1. Skip the next St.* Repeat from * to* across ending with an Edc in the last St. Turn. [66(73, 81, 88, 95, 103, 110, 118, 125) Edc]
Row 5: Ch 2. Working in the Blo, Ehdc in the first St and each St across ending with an Ehdc in the top of the Ch 3 turning Ch. Turn. [132(146, 162, 176, 190, 206, 220, 236, 250) Ehdc]
Row 6: Ch 2. Working in the Blo, Ehdc in the first St and each St across. Turn. [132(146, 162, 176, 190, 206, 220, 236, 250) Ehdc]
***Reminder- All rows are worked in the BLO with the exception of the Ps rows which are worked through both loops.***
Repeat rows 1-6 until you have a total of 29 rows.
***If you would like your sweater to be shorter or longer simply add or omit rows before you divide for your arm holes and continue working in the pattern row repeat***
Do Not Finish Off. This is where we will split for the arm holes. Row numbers will restart for simplicity.
Panels will be divided as follows
| Size | Left Front | Back | Right Front |
| XS | 30 | 70 | 30 |
| S | 34 | 76 | 34 |
| M | 36 | 88 | 36 |
| L | 40 | 94 | 40 |
| XL | 44 | 100 | 44 |
| 2XL | 48 | 108 | 48 |
| 3XL | 52 | 114 | 52 |
| 4XL | 56 | 122 | 56 |
| 5XL | 58 | 132 | 58 |
With working yarn still attached begin your first front panel.
First Front Panel
Row 1: Ch 2. Ehdc in the Blo of the first 30(34, 36, 40, 44, 48, 52, 56, 58) stitches. Turn. [30(34, 36, 40, 44, 48, 52, 56, 58) Ehdc]
Row 2: Ch 1. Skip the first St. *Ps next, don’t forget your Ch 1 to secure the Ps after each one, skip the next St*. Repeat from * to * across ending with a Ps in the last St. Turn. [15(17, 18, 20, 22, 24, 26, 28, 29) Ps]
Row 3: Ch 2. Ehdc in the Blo of the first St and each St across. Turn. [30(34, 36, 40, 44, 48, 52, 56, 58) Ehdc]
Row 4: Ch 2. Ehdc in the Blo of the first St and each St across. Turn. [30(34, 36, 40, 44, 48, 52, 56, 58) Ehdc]
Row 5: Ch 3. Skip the first St (where the Ch 3 is). *Edc in the Blo of the next St, Ch 1. Skip the next St.* Repeat from * to* across ending with an Edc in the last St. Turn. [15(17, 18, 20, 22, 24, 26, 28, 29) Edc]
Row 6: Ch 2. Ehdc in the Blo of the first St and each St across ending with an Ehdc in the top of the Ch 3 turning Ch. Turn. [30(34, 36, 40, 44, 48, 52, 56, 58) Ehdc]
Repeat rows 1- 6 until you have a total of 15(15, 16, 16, 18, 18, 19, 19, 19) rows in the panel.
***Each size should finish off on an Ehdc row***
Finish off leaving long tail to seam shoulders
Back Panel
With your first front panel done and on your right side, skip the first open stitch from row 29. Attach yarn in the next stitch.

Row 1: Ch 2. Ehdc in the Blo of the next 70(76, 88, 94, 100, 108, 114, 122, 132) stitches. Turn. [70(76, 88, 94, 100, 108, 114, 122, 132) Ehdc]
Row 2: Ch 1. Skip the first St. *Ps next, don’t forget your Ch 1 to secure the Ps after each one, skip the next St*. Repeat from * to * across ending with a Ps in the last St. Turn. [35(38, 44, 47, 50, 54, 57, 61, 66) Ps]
Row 3: Ch 2. Ehdc in the Blo of the first St and each St across. Turn. [70(76, 88, 94, 100, 108, 114, 122, 132) Ehdc]
Row 4: Ch 2. Ehdc in the Blo of the first St and each St across. Turn. [70(76, 88, 94, 100, 108, 114, 122, 132) Ehdc]
Row 5: Ch 3. Skip the first St (where the Ch 3 is). *Edc in the Blo of the next St, Ch 1. Skip the next St.* Repeat from * to* across ending with an Edc in the last St. Turn. [35(38, 44, 47, 50, 54, 57, 61, 66) Edc]
Row 6: Ch 2. Ehdc in the Blo of the first St and each St across ending with an Ehdc in the top of the Ch 3 turning Ch. Turn. [70(76, 88, 94, 100, 108, 114, 122, 132) Ehdc]
Repeat rows 1- 6 until you have a total of 15(15, 16, 16, 18, 18, 19, 19, 19) rows in the panel.
Finish Off
Second Front Panel
With your first front panel and back panel done and on your right side, skip the first open stitch from row 29. Attach yarn in the next stitch.
Row 1: Ch 2. Ehdc in the Blo of the last 30(34, 36, 40, 44, 48, 52, 56, 58) stitches. Turn. [30(34, 36, 40, 44, 48, 52, 56, 58) Ehdc]
Row 2: Ch 1. Skip the first St. *Ps next, don’t forget your Ch 1 to secure the Ps after each one, skip the next St*. Repeat from * to * across ending with a Ps in the last St. Turn. [15(17, 18, 20, 22, 24, 26, 28, 29) Ps]
Row 3: Ch 2. Ehdc in the Blo of the first St and each St across. Turn. [30(34, 36, 40, 44, 48, 52, 56, 58) Ehdc]
Row 4: Ch 2. Ehdc in the Blo of the first St and each St across. Turn. [30(34, 36, 40, 44, 48, 52, 56, 58) Ehdc]
Row 5: Ch 3. Skip the first St (where the Ch 3 is). *Edc in the Blo of the next St, Ch 1. Skip the next St.* Repeat from * to* across ending with an Edc in the last St. Turn. [15(17, 18, 20, 22, 24, 26, 28, 29) Edc]
Row 6: Ch 2. Ehdc in the Blo of the first St and each St across ending with an Ehdc in the top of the Ch 3 turning Ch. Turn. [30(34, 36, 40, 44, 48, 52, 56, 58) Ehdc]
Repeat rows 1- 6 until you have a total of 15(15, 16, 16, 18, 18, 19, 19, 19) rows in the panel.
Finish off leaving long tail to seam shoulders
Seaming the shoulders
With your sweater laying in front of you, fold the left panel over the back panel and your right panel over the back panel.
It should be noted that there is no Right Side or Wrong side to this cardi as both sides look the same. So it does not matter which side you do the seam on.
You should line up your stitches to assure you sew the shoulders evenly. For example, if your front panel is 22 stitches wide, you will seam up to the 22nd stitch of the back panel on both sides.
Using your yarn needle and yarn tails mattress seam the shoulder pieces to the back piece along the black line.

Sleeves (Make 2)
Cuff
Ch 15
Row 1: Sc in the second Ch and in each Ch across. Turn. [14 Sc]
Row 2: Ch 1. Sc in the Blo of each St across. Turn. [14 Sc]
Repeat row 2 until you have a total of 32(32, 32, 32, 37, 37, 39, 39, 41) rows of ribbing.
Do not fasten off.
You will now be connecting the two short ends of the cuff by slip stitching them together.
Fold the cuff with the short sides together (row 1 & row 32(32, 32, 32, 37, 37, 39, 39, 41). Going through both loops on each end of the band, Sl St the edges together. [14 Sl St]
Ch 1 and flip the band to where the seam is now on the inside of the band and turn your cuff to face you.
You will now start working the main portion of the sleeves


Row 1: 2 Sc in the first St (where your Ch 1 is) and in each stitch around. Join with a Sl St to first Sc. [64(64, 64, 64, 74, 74, 78, 78, 82) Sc]

***This portion of the sleeves is worked in TURNED rounds. Join at the end of each round with a Sl St and then TURN your work so that your next round will be worked in the opposite direction.***
Row 2: Ch 1, Ps in the same space as your Ch 1, don’t forget your Ch 1 to secure the Ps after each one, skip the next St, Ps in the following St. Continue around, ending with a Ps in the second to last St, join into your first Ps. Turn. [32(32, 32, 32, 37, 37, 39, 39, 41) Ps]
Row 3: Ch 2. Working in the Blo, Ehdc in the first St and each St around. Join with a Sl St to your first Ehdc. Turn. [64(64, 64, 64, 74, 74, 78, 78, 82) Ehdc]
Row 4: Ch 2. Working in the Blo, Ehdc in the first St and each St around. Join with a Sl St to your first Ehdc. Turn. [64(64, 64, 64, 74, 74, 78, 78, 82) Ehdc]
Row 5: Ch 3. Working in the Blo, Skip the first St (where the Ch 3 is) *Edc, Ch 1 in the next St, skip the next St*. Repeat from * to * around ending with an Edc in the last St. Join with a Sl St to the top of the Ch 3. Turn. [32(32, 32, 32, 37, 37, 39, 39, 41) Edc]
Row 6: Ch 2. Working in the Blo, Ehdc in the first St and each St around. Join with a Sl St to your first Ehdc. Turn. [64(64, 64, 64, 74, 74, 78, 78, 82) Ehdc]
Row 7: Ch 2. Working in the Blo, Ehdc in the first St and each St around. Join with a Sl St to your first Ehdc. Turn. [64(64, 64, 64, 74, 74, 78, 78, 82) Ehdc]
Repeat rows 2-7 until you have a total of 29(30, 30, 30, 32, 32, 32, 33, 33) rows.
***If you would like your sleeves to be shorter or longer simply omit or add more rows before you finish off.***
Finish off leaving a long tail to sew the sleeves to your sweater.
Attaching sleeves
Turn your sweater and your sleeves which ever way you choose is wrong side out. Line up your sleeve seam with the under side of the armhole and mattress seam around the arm hole.

Turn your sweater right side out.
Collar Band
Turn your sweater so that the Right side front panel is facing you. Attach yarn in the bottom right corner of your sweater.

Row 1: Sc evenly around the edges of the first front, around the neckline, and back down the second front. Make sure to use the same amount of Sc on both sides of the sweater. When you reach the bottom corner of the Left front panel, Ch 1 and Turn.
Row 2-7: Sc in each stitch around.
***The amount of Sc stitches around does not matter, a good rule is to place 2 Sc St in the edge of each of the rows. You can also adjust the collar width by doing more or less rows of Sc around. ***
Pockets (make 2)
Ch 26
Row 1: Ehdc in the 3rd Ch from hook and in each Ch across. Turn. [24 Ehdc]
Row 2: Ch 2. Ehdc in the Blo of the first St and each St across. Turn. [24 Ehdc]
Row 3: Ch 3. Skip the first St (where the Ch 3 is). *Edc in the Blo of the next St, Ch 1. Skip the next St.* Repeat from * to* across ending with an Edc in the last St. Turn. [12 Edc]
Row 4: Ch 2. Ehdc in the Blo of the first St and each St across. Turn. [24 Ehdc]
Row 5: Ch 2. Ehdc in the Blo of the first St and each St across. Turn. [24 Ehdc]
Row 6: Ch 1. Skip the first St. *Ps next, don’t forget your Ch 1 to secure the Ps after each one, skip the next St*. Repeat from * to * across ending with a Ps in the last St. Turn. [12 Ps]
Row 7: Ch 2. Ehdc in the Blo of the first St and each St across. Turn. [24 Ehdc]
Row 8: Ch 2. Ehdc in the Blo of the first St and each St across. Turn. [24 Ehdc]
Row 9: Ch 3. Skip the first St (where the Ch 3 is). *Edc in the Blo of the next St, Ch 1. Skip the next St.* Repeat from * to* across ending with an Edc in the last St. Turn. [12 Edc]
Row 10: Ch 2. Ehdc in the Blo of the first St and each St across. Turn. [24 Ehdc]
Finish Off leaving a long tail to attach pocket
Attaching pockets
Lay your sweater in front of you. Position the pockets where you like them. I lined the bottom of my pocket up with row 2 of the cardigan and 4 Ehdc stitches from the collar. Using your yarn tail, mattress seam the pocket on to the sweater.
Tip: It is useful to place stitch markers in the 4 corners of your pocket attaching it to the sweater so that the pocket doesn’t move around as much while seaming.
Tie off, tuck in those ends and enjoy your new Haven Lite Cardigan!
Make sure to pin this pattern for later, and if you do make one tag me @Cactus.and.lace on Instagram and use the hashtag #CactusandlaceDesigns . I can’t wait to see your Haven Lite Cardigans, and I would love to share your pics! 🌵
Other Free Crochet Patterns You Might Love


The Carli Cardigan // The Evie Cardigan // The Paisley Cardigan // The Haven Pullover