
The Paisley Slouchy Cardigan ~ Free Crochet Pattern

A Slouchy Cardigan ~ The Paisley Cardi ~ is a free crochet pattern here on the blog! This Cardi is made in one piece, with minimal seaming, therefore making it a quick and easy project for beginners and experienced crocheters alike.
Read through my inspiration and design process, scroll down for the Free Pattern or purchase the Full Color coded Printable PDF Here!

Paisley Slouchy Cardigan Inspiration + Design
With sweater weather in full effect, I decided that it was about time to introduce to you your new favorite Slouchy Cardigan, The Paisley Cardi! When I started designing this cardi, I knew I wanted it to have a similar look and feel as The Haven Cardigan, my most popular design to date. So I knew it had to be oversized, cozy, and full of amazing texture with a little bit of my boho flare!
Like always, I like to create my boho textures using combinations and simple modifications of beginner stitches. This stitch pattern may look intricate or difficult, but trust me, it’s not! All you need to know is how to double crochet, half double crochet and puff stitch to make this Slouchy Cardigan, it’s really that easy!
Another great thing about this Slouchy Cardigan is how easy it is to construct. I don’t know about you, but I’m not a huge fan of seaming large sections, so this sweater is made in one main body piece, and then separates for the arm holes. The sleeves are then made separately and attached at the end!

The Yarn
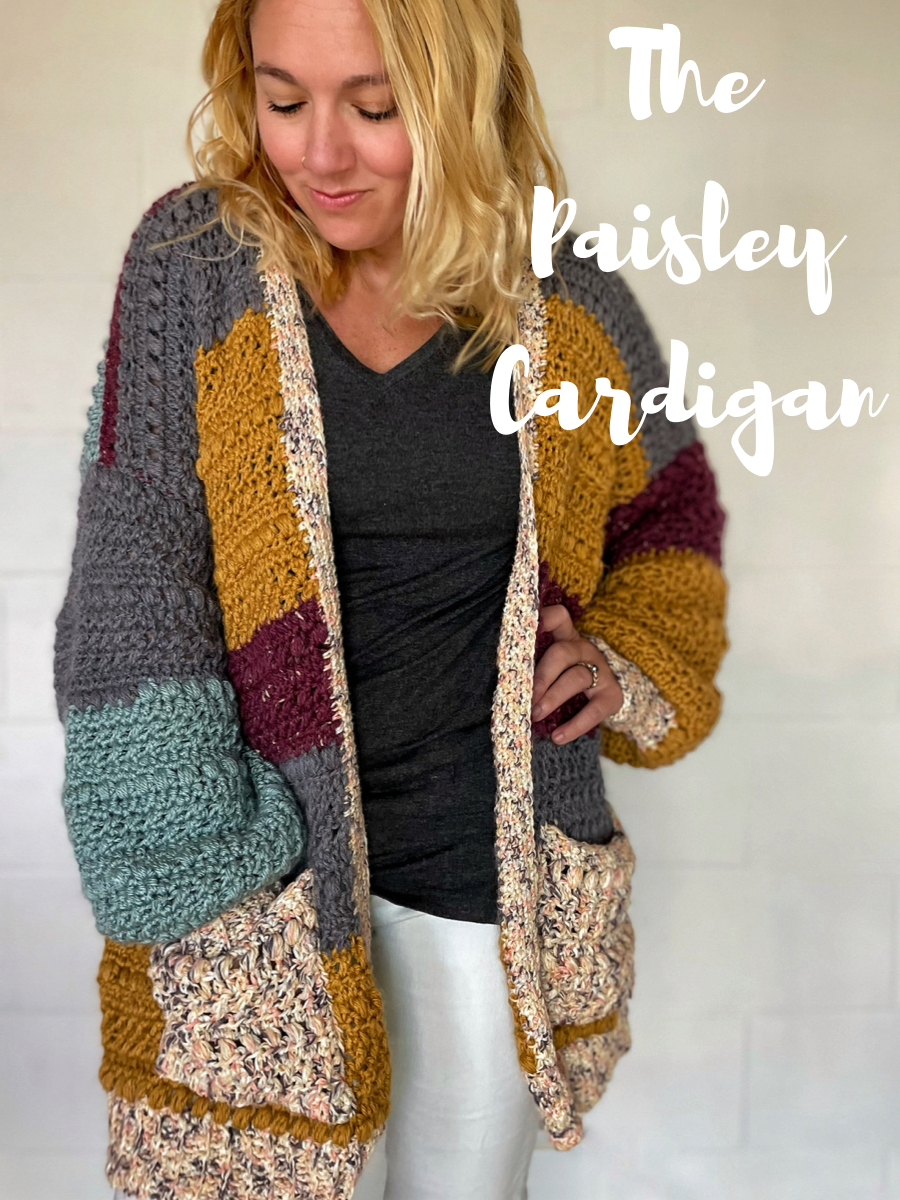
For this Slouchy Cardigan, I decided to combine a bunch of random skeins of worsted weight (category 4) yarn that I had in my stash. I know we all have way too many half used or barely used skeins in our stash, and since patchwork seems to be in style, I thought what better way to use up my stash then by making a multicolored “scrap” cardigan. I wasn’t too sure about mixing all the different colors, but once it was done, I actually absolutely love it! But if mixing a bunch of colors isn’t your style, don’t worry, it looks just as amazing in a solid color!
Some Category 4 Worsted Weight yarns that I love are:

Pattern Links
~Purchase the Color Coded Printable PDF on Etsy.
~Purchase the Color Coded Printable PDF on LoveCrafts.
~Save it to your Ravelry Here.

To Sum it up:
The Paisley Cardigan is an easy slouchy cardigan that is perfect for beginner and experienced crocheters alike. It is made in one piece with minimal seaming using slight variations of beginner stitches! The oversized fit of this slouchy cardigan make it flattering for all sizes.
Yarn
Category 4 Worsted weight yarn
Below is the approximate yardage for all sizes:
XS– Approximately 1250-1300 yards
S– Approximately 1450-1500 yards
M– Approximately 1600-1650 yards
L– approximately 1700-1750 yards
XL– Approximately 1900-1950 yards
2XL– Approximately 2000-2050 yards
3XL– Approximately 2150-2200 yards
4XL– Approximately 2300-2350 yards
5XL– Approximately 2500-2550 yards
Notions
-Size K (6.5 mm) Hook
-Yarn Needle
Gauge
13 St and 7 rows in Extended Hdc = 4”
Sizing
This Crochet Slouchy Cardigan is made to be oversized with approximately 9” of positive ease. The measurements are Finished garment sizes, not actual bust measurements. When choosing your size, find the bust measurement that equals approximately 9” more than your actual bust measurement and make that size.
| Size | XS | S | M | L | XL | 2XL | 3XL | 4XL | 5XL |
| Bust | 39” | 43” | 47” | 51” | 55” | 59” | 63” | 67” | 71” |
| Length | 30” | 30” | 31” | 31” | 32” | 32” | 32” | 32” | 32” |
Abbreviations Used
Ch- Chain
Yo- Yarn Over
St- Stitch
Sl St- Slip Stitch
Sc- Single Crochet
Blo- Back Loop Only
Ehdc- Extended Half Double Crochet
Dc- Double Crochet
Ps- Puff Stitch
Pattern Notes
-Pattern is worked from the bottom up in one piece and then divided for the armholes.
-Sleeves are worked separately from the cuff up and then attached to the cardigan.
-Slouchy Cardigan is worked in a 5 row repeat; The row repeat is as follows- Ps, Ehdc, Xdc, Xdc, Ehdc.
-Ch 1 and Ch 2 do NOT count as Stitches throughout.
-Total Stitches are indicated between [ ].
-The sizing guide follows size XS(S, M, L, XL, 2XL, 3XL, 4XL, 5XL). E.g. “Ehdc 114(126, 140, 152, 166, 178, 192, 204, 218)” means Ehdc 114 for XS, Ehdc 126 for Small, Ehdc 140 for Medium, Ehdc 152 for Large, Ehdc 166 for XL, Ehdc 178 for 2XL, Ehdc 192 for 3XL, Ehdc 204 for 4XL, Ehdc 218 for 5XL. If there is only one number, it applies to all sizes.
Special Stitches
Extended Half Double Crochet- Yo, insert hook into the next St. Draw up a loop (3 loops on hook). Yo, pull through one loop. Yo, pull through remaining 3 loops.
Crossed Double Crochet- Skip the next stitch, Dc into the following stitch. Then working behind the Dc stitch that you just made, Dc into the previously skipped stitch.


Puff Stitch- Yo, insert hook into next stitch and bring up a loop, you now have 3 loops on your hook. Yo, insert hook back into the same stitch, and bring up a loop, you now have 5 loops on your hook. Repeat this 2 more times (4 times total) ending with 9 loops on your hook. Yo, pull through all the loops, and finish with a Ch 1.

The Paisley Slouchy Cardigan
Sizes Written XS(S, M, L, XL, 2XL, 3XL, 4XL, 5XL)
Starting with the ribbing.
Ch 11
Row 1: Sc in the 2nd Ch from the hook and in each Ch across. Turn [10]
Row 2: Ch 1. Sc in the Blo of each St across. Turn. [10]
Repeat Row 2 until you have a total of 103(115, 129, 141, 155, 167, 181, 193, 207) rows of ribbing.
Do not Fasten Off
You will now be working into the top of your ribbing.
Starting in the very first open space, 2 Sc, then *Sc 9 (10, 11, 12, 14, 15, 16, 17, 18), 2 Sc next* a total of 10 times ending with a Sc in the remaining 2 (4, 8, 10, 4, 6, 10, 12, 16) stitches. [114(126, 140, 152, 166, 178, 192, 204, 218) Sc]

Row 1: Ch 1. Skip the first St. (where the Ch 1 is) *Ps in the next St, don’t forget your Ch 1 to secure the Ps after each one, skip the next St*. Repeat from * to * across ending with a (Ps, Ch 1) in the last St. Turn. [57(63, 70, 76, 83, 89, 96, 102, 109) Ps]
Row 2: Ch 2. (You will now technically have 3 Ch stitches, the Ch 1 closing Ch and the 2 turning chains.) Ehdc in the first St, which is the Ps closing Ch from the previous row. Ehdc in each St across. Turn. [114(126, 140, 152, 166, 178, 192, 204, 218) Ehdc]
A Full Stitch Tutorial to walk you through the tricky parts of the pattern is available in the Printable PDF.
Row 3: Ch 2. Skip the first St, Dc in the the 2nd St. Then going behind the Dc you just made, Dc in the skipped St. (one X created). *Skip the next stitch, Dc in the next St. Then going behind the Dc you just made, Dc in the skipped St*. Repeat from * to * across. Turn. [57(63, 70, 76, 83, 89, 96, 102, 109) X’s]
Row 4: Ch 2. Skip the first St, Dc in the the 2nd St. Then going behind the Dc you just made, Dc in the skipped St. (one X created). *Skip the next stitch, Dc in the next St. Then going behind the Dc you just made, Dc in the skipped St*. Repeat from * to * across. Turn. [57(63, 70, 76, 83, 89, 96, 102, 109) X’s]
Row 5: Ch 2. Ehdc in the first St and each St across. Turn. [114(126, 140, 152, 166, 178, 192, 204, 218) Ehdc]
Repeat Rows 1-5 until you have a total of 29 rows
Do not finish off, this is where we will divide for the armholes. Row numbers will restart for simplicity.
***If you would like your sweater to be shorter or longer, then simply add or omit rows before you divide for your arm holes and continue working in the pattern row repeat***
Panels will be divided as follows
| Size | Left Front | Back | Right Front |
| XS | 28 | 58 | 28 |
| S | 30 | 66 | 30 |
| M | 32 | 76 | 32 |
| L | 36 | 80 | 36 |
| XL | 40 | 86 | 40 |
| 2XL | 44 | 90 | 44 |
| 3XL | 48 | 96 | 48 |
| 4XL | 50 | 104 | 50 |
| 5XL | 54 | 110 | 54 |
First Front Panel
With working yarn still attached.
Row 1: Ch 2. Ehdc in the first St and each of the next 27(29, 31, 35, 39, 43, 47, 49, 53) St. Leaving the rest of the Stitches unworked. Turn. [28(30, 32, 36, 40, 44, 48, 50, 54) Ehdc]
Row 2: Ch 1. Skip the first St. (where the Ch 1 is) *Ps in the next St, don’t forget your Ch 1 to secure the Ps after each one, skip the next St*. Repeat from * to * across ending with a (Ps, Ch 1) in the last St. Turn. [14(15, 16, 18, 20, 22, 24, 25, 27) Ps]
Row 3: Ch 2. Ehdc in the first St and each St across. Turn. [28(30, 32, 36, 40, 44, 48, 50, 54) Ehdc]
Row 4: Ch 2. Skip the first St, Dc in the the 2nd St. Then going behind the Dc you just made, Dc in the skipped St. (one X created). *Skip the next stitch, Dc in the next St. Then going behind the Dc you just made, Dc in the skipped St*. Repeat from * to * across. Turn. [14(15, 16, 18, 20, 22, 24, 25, 27) X’s]
Row 5: Ch 2. Skip the first St, Dc in the the 2nd St. Then going behind the Dc you just made, Dc in the skipped St. (one X created). *Skip the next stitch, Dc in the next St. Then going behind the Dc you just made, Dc in the skipped St*. Repeat from * to * across. Turn. [14(15, 16, 18, 20, 22, 24, 25, 27) X’s]
Row 6: Ch 2. Ehdc in the first St and each St across. Turn. [28(30, 32, 36, 40, 44, 48, 50, 54) Ehdc]
Repeat Rows 2-6 until you have a total of 14(14, 15, 15, 16, 16, 18, 18, 18) rows.
Finish Off leaving a long tail for seaming.
Back Panel
Join in the first open St from row 29.
Row 1: Ch 2, and starting in the same St as your join, Ehdc in the next 58(66, 76, 80, 86, 90, 96, 104, 110) stitches. Leaving the remaining stitches unworked. Turn. [58(66, 76, 80, 86, 90, 96, 104, 110) Ehdc]
Row 2: Ch 1. Skip the first St. (where the Ch 1 is) *Ps in the next St, don’t forget your Ch 1 to secure the Ps after each one, skip the next St*. Repeat from * to * across ending with a (Ps, Ch 1) in the last St. Turn. [29(33, 38, 40, 43, 45, 48, 52, 55) Ps]
Row 3: Ch 2. Ehdc in the first St and each St across. Turn. [58(66, 76, 80, 86, 90, 96, 104, 110) Ehdc]
Row 4: Ch 2. Skip the first St, Dc in the the 2nd St. Then going behind the Dc you just made, Dc in the skipped St. (one X created). *Skip the next stitch, Dc in the next St. Then going behind the Dc you just made, Dc in the skipped St*. Repeat from * to * across. Turn. [29(33, 38, 40, 43, 45, 48, 52, 55) X’s]
Row 5: Ch 2. Skip the first St, Dc in the the 2nd St. Then going behind the Dc you just made, Dc in the skipped St. (one X created). *Skip the next stitch, Dc in the next St. Then going behind the Dc you just made, Dc in the skipped St*. Repeat from * to * across. Turn. [29(33, 38, 40, 43, 45, 48, 52, 55) X’s]
Row 6: Ch 2. Ehdc in the first St and each St across. Turn. [58(66, 76, 80, 86, 90, 96, 104, 110) Ehdc]
Repeat Rows 2-6 until you have a total of 14(14, 15, 15, 16, 16, 18, 18, 18) rows.
Finish Off
Second Front Panel
Join in the next open St from row 29.
Row 1: Ch 2, and starting in the same St as your join, Ehdc in the last 28(30, 32, 36, 40, 44, 48, 50, 54) stitches. Turn. [28(30, 32, 36, 40, 44, 48, 50, 54) Ehdc]
Row 2: Ch 1. Skip the first St. (where the Ch 1 is) *Ps in the next St, don’t forget your Ch 1 to secure the Ps after each one, skip the next St*. Repeat from * to * across ending with a (Ps, Ch 1) in the last St. Turn. [14(15, 16, 18, 20, 22, 24, 25, 27) Ps]
Row 3: Ch 2. Ehdc in the first St and each St across. Turn. [28(30, 32, 36, 40, 44, 48, 50, 54) Ehdc]
Row 4: Ch 2. Skip the first St, Dc in the the 2nd St. Then going behind the Dc you just made, Dc in the skipped St. (one X created). *Skip the next stitch, Dc in the next St. Then going behind the Dc you just made, Dc in the skipped St*. Repeat from * to * across. Turn. [14(15, 16, 18, 20, 22, 24, 25, 27) X’s]
Row 5: Ch 2. Skip the first St, Dc in the the 2nd St. Then going behind the Dc you just made, Dc in the skipped St. (one X created). *Skip the next stitch, Dc in the next St. Then going behind the Dc you just made, Dc in the skipped St*. Repeat from * to * across. Turn. [14(15, 16, 18, 20, 22, 24, 25, 27) X’s]
Row 6: Ch 2. Ehdc in the first St and each St across. Turn. [28(30, 32, 36, 40, 44, 48, 50, 54) Ehdc]
Repeat Rows 2-6 until you have a total of 14(14, 15, 15, 16, 16, 18, 18, 18) rows.
Finish Off leaving a long tail for seaming.
Seaming the shoulders
With your sweater laying in front of you, fold the left panel forward over the back panel and your right panel forward over the back panel.
It should be noted that there is no Right Side or Wrong side to this cardi as both sides look the same. So it does not matter which side you do the seam on.
You should line up your stitches to assure you sew the shoulders evenly.
For example, if your front panel is 28 stitches wide, you will seam up to the 28th stitch of the back panel on both sides.
Using your yarn needle and yarn tails mattress seam the shoulder pieces to the back piece.

Sleeves (Make 2)
Cuff
Ch 15
Row 1: Sc in the second Ch and in each Ch across. Turn. (14)
Row 2: Ch 1. Sc in the Blo of each St across. Turn. (14)
Repeat Row 2 until you have a total of 26( 26, 26, 26, 31, 31, 31, 31, 36) rows of ribbing.
Do not fasten off.
You will now be connecting the two short ends of the cuff by slip stitching them together.
Fold the cuff with the short sides together (row 1 & row 26, 26, 26, 26, 31, 31, 31, 31, 36). Going through both loops on each end of the band, Sl St the edges together. (14 Sl St)
Ch 1 and flip the band to where the seam is now on the inside of the band and turn your cuff to face you.
You will now start working the main portion of the sleeves
Round 1: 2 Sc in the first St (where your Ch 1 is) and in each stitch around. Join with a Sl St to first Sc. [54(54, 54, 54, 64, 64, 64, 64, 74) Sc]

Round 2: Ch 1, Ps in the same space as your Ch 1, don’t forget your Ch 1 to secure the Ps after each one, skip the next St, Ps in the following St. Continue around, ending with a Ps in the second to last St, join into your first Ps. [27(27, 27, 27, 32, 32, 32, 32, 37) Ps]
A Full Stitch Tutorial to walk you through the tricky parts of the pattern is available in the Printable PDF.
Round 3: Ch 2, Ehdc in each St around. Join. [54(54, 54, 54, 64, 64, 64, 64, 74) Ehdc]
Round 4: Ch 2. Skip the first St, Dc in the the 2nd St. Then going behind the Dc you just made, Dc in the skipped St. (one X created). *Skip the next stitch, Dc in the next St. Then going behind the Dc you just made, Dc in the skipped St*. Repeat from * to * around. Join. [27(27, 27, 27, 32, 32, 32, 32, 37) X’s]
Round 5: Ch 2. Skip the first St, Dc in the the 2nd St. Then going behind the Dc you just made, Dc in the skipped St. (one X created). *Skip the next stitch, Dc in the next St. Then going behind the Dc you just made, Dc in the skipped St*. Repeat from * to * around. Join. [27(27, 27, 27, 32, 32, 32, 32, 37) X’s]
Round 6: Ch 2, Ehdc in each St around. Join. [54(54, 54, 54, 64, 64, 64, 64, 74) Ehdc]
Repeat Rounds 2- 6 until you have a total of 22(23, 24, 24, 25, 25, 25, 26, 26) rounds.
***If you would like your sleeves to be shorter or longer, then simply omit or add more rows before you finish off.***
Finish off leaving a long tail to sew the sleeves to your cardigan.
Attaching sleeves
Turn your sweater and your sleeves which ever way you choose is wrong side out. Line up your sleeve seam with the under side of the armhole and mattress seam around the arm hole.
Turn your sweater right side out.
Collar Band
Turn your sweater so that the Right side front panel is facing you. Attach yarn in the bottom right corner of your sweater.
Row 1: Sc evenly around the edges of the first front, around the neckline, and back down the second front. Make sure to use the same amount of Sc on both sides of the sweater. When you reach the bottom corner of the Left front panel, Ch 1 and Turn.
Row 2-7: Sc in each stitch around.
***The amount of Sc stitches around does not matter, a good rule is to place 2 Sc St in the edge of each of the rows. You can also adjust the collar width by doing more or less rows of Sc around. ***
Pockets (make 2)
Ch 22
Row 1: Ehdc in the 3rd Ch and each Ch across. Turn. [20 Ehdc]
Row 2: Ch 2. Skip the first St, Dc in the the 2nd St. Then going behind the Dc you just made, Dc in the skipped St. (one X created). *Skip the next stitch, Dc in the next St. Then going behind the Dc you just made, Dc in the skipped St*. Repeat from * to * across. Turn. [10 X’s]
Row 3: Ch 2. Skip the first St, Dc in the the 2nd St. Then going behind the Dc you just made, Dc in the skipped St. (one X created). *Skip the next stitch, Dc in the next St. Then going behind the Dc you just made, Dc in the skipped St*. Repeat from * to * across. Turn. [10 X’s]
Row 4: Ch 2. Ehdc in the first St and each St across. Turn. [20 Ehdc]
Row 5: Ch 1. Skip the first St. (where the Ch 1 is) *Ps in the next St, don’t forget your Ch 1 to secure the Ps after each one, skip the next St*. Repeat from * to * across ending with a (Ps, Ch 1) in the last St. Turn. [10 Ps]
Row 6: Ch 2. Ehdc in the first St and each St across. Turn. [20 Ehdc]
Row 7- Row 10: Repeat rows 2-5.
Row 11- Row 13: Ch 1. Sc in the first St and each St across. [20 Sc]
Do Not Finish Off
Ch 1, and Sc along the edges of your pocket.
Finish Off
Attaching pockets
Lay your sweater in front of you. Position the pockets where you like them. I lined the bottom of my pocket up with row 2 on both of the front panels about 5 Ehdc stitches from the collar. Take your yarn tail and mattress stitch the pocket to the sweater.
Tip: It is useful to place stitch markers in the 4 corners of your pocket attaching it to the sweater so that the pocket doesn’t move around as much while seaming.

Tie off, tuck in those ends and enjoy your new Paisley Cardigan!
Make sure to pin this pattern for later, and if you do make one tag me @Cactus.and.lace on Instagram and use the hashtag #CactusandlaceDesigns . I can’t wait to see your Paisley Cardigans, and I would love to share your pics! 🌵
Other Free Crochet Patterns You Might Love


The Austyn Pullover// The Haven Pullover// The Carli Cardigan// The Haven Cardigan