
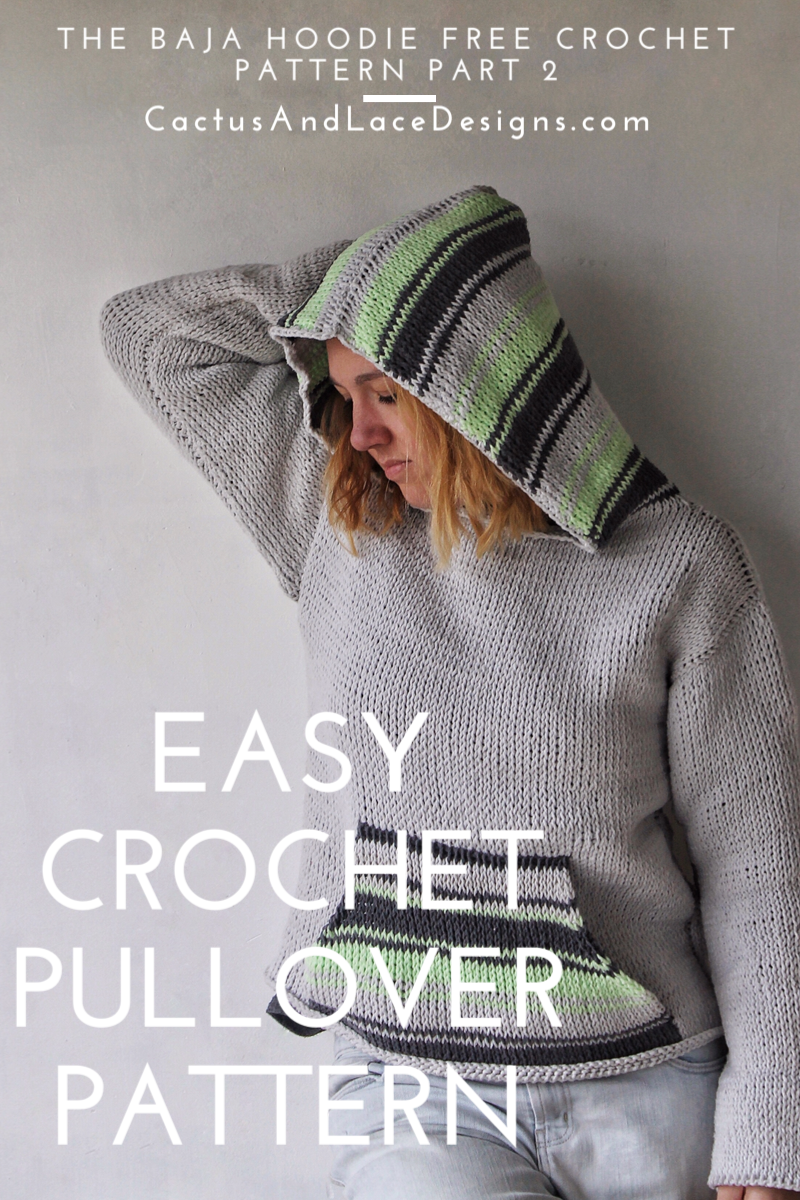
Easy Crochet Pullover Free Pattern~ The Baja Hoodie Part 2

In part 2 of the Baja Hoodie, we will be making the sleeves, the hood and lastly making the kangaroo pocket. You can find Part 1 of the Free pattern here, or you can get the complete printable Baja Hoodie pattern Here!

Hey guys, welcome back to The Baja Hoodie Pattern!
Let me catch you up a bit! In Part 1, we discussed the “size free” sizing guide used for this pattern and how to create your very own custom fitted garment. Then we made the main body pieces and seamed them together!
Today we will be working on the sleeves first. Then moving on to the fun part; the color work on the hood and the pocket. Then, finally finishing up by attaching all the pieces together!
Want the Full Baja Hoodie tutorial in one place?
If you would like the Baja Hoodie full tutorial all in one place, grab the full PDF with complete, color coded size instructions (ranging from XS- 5XL), as well as the Size Free version Here.

Purchase the complete printable Baja Hoodie Pattern Here
Check out Part 1 of the Pattern Here
Save it to your Ravelry Here


Abbreviations Used
Ch- Chain
St- Stitch
Yo- Yarn over
Tks- Tunisian Knit Stitch
RetP- Return Pass
Dec- Decrease
Sc- Single Crochet
Special Stitches
Decrease (Dec)
Insert your hook in between the next 2 vertical columns, coming out the back of your work. Yo, draw up a loop. One decrease made.


Sleeves (make 2) with Color A
Take the number of rows that you left open for the arm holes and multiply that by 2.
_____________ x 2 = ____________
(# of rows for Arm Holes) (Sleeve width)
For example, I left 30 rows open for the arm holes. 30 x 2 = 60. I will chain 60 to begin my sleeves.
Row 1: Ch your sleeve width. Insert your hook into the back bump of the 2nd Ch from your hook. Yo, draw up a loop, you now have 2 loops on your hook. Insert your hook into the back bump of the next Ch. Yo, draw up a loop. Repeat for each Ch. You will now have the same amount of loops on your hook as the amount you chained. RetP.
Row 2-10: Tks in each St. RetP.
Row 11: Dec, Tks across the rest of the row until you have 2 St remaining then Dec. RetP.
Row 12-14: Tks in each St. RetP.
Row 15: Dec, Tks across the rest of the row until you have 2 St remaining then Dec. RetP.
Row 16-18: Tks in each St. RetP.
Row 19: Dec, Tks across the rest of the row until you have 2 St remaining then Dec. RetP.
Row 20-22: Tks in each St. RetP.
Row 23: Dec, Tks across the rest of the row until you have 2 St remaining then Dec. RetP.
Row 24-26: Tks in each St. RetP.
Row 27: Dec, Tks across the rest of the row until you have 2 St remaining then Dec. RetP.
Row 28: Tks in each St. RetP.
Repeat row 28 until your sleeves are reach your desired length.
Suggested lengths for Adult size small is at least 18”, medium 18.5”, large 19”.
Finish off, leaving a long tail (at least 3 times the length of the sleeve) for seaming and attaching sleeve to main body.
Hood (Optional)
Step 1: With your sweater laying in front of you, determine the middle stitch of your neck line and place a stitch marker.
Step 2: Count 5 stitches to the left of your stitch marker. This is where you will join your yarn.

You can adjust the width of the hood opening by attaching your yarn closer or farther away from your center stitch marker.
Note- our first row of the hood will be made by working into the vertical bars from the last row of the panels, just as a regular Tks row.
Row 1: With color A, join yarn in the 5th St to the left of your stitch marker by inserting hook between the 2 vertical bars, and drawing up a loop. Continue to Tks around the neck opening until you get to the 5th St from your stitch marker. Complete a normal RetP.


For the remainder of the hood, you will be working Tks rows in the color pattern until your hood reaches your desired length.
Suggested hood height for adults is at least 13”-13.5”.
***When changing colors on the hood, you will complete a regular Tks forward pass in the row color. Before you begin your RetP, Yo with your new color and complete a regular Ret.P in the new color.***


Color Pattern
A, A, B, A, B, B, B, B, C, B, C, C, C, C, A, C, A, A. Then repeat for as many rows as desired.
When your hood is the length you want, turn, Ch 1 and Sc along the the edge of the hood opening. Once you reach the other side, finish off, leaving a long tail to sew up your hood.


Fold your hood right sides facing in, then using your yarn needle and yarn tail, seam up the hood.

Seaming and Attaching sleeves
Lay your sleeve right side facing up, then fold it in half to create your sleeve. The right sides of the sleeve are now facing each other. Then, take your yarn needle and long tail and seam up the edges of the sleeve.


Once you reach your arm hole opening, you will line up your sleeve seam with the seam on your panels and continue to mattress seam around the arm hole.

Turn your hoodie right side out.
Kangaroo Pocket
There are two different sets of instructions for how to construct your pocket. The First set of instructions gives you complete control to customize the pocket to your preference, while the second set gives you more detailed instructions with stitch numbers and row details. Please read through both sets before determining which best suits you.
***Pocket is worked in Tks in the color pattern for both sets of instructions. When changing colors on the pocket, you will complete a regular Tks forward pass in the row color. Before you begin your RetP, Yo with your new color and complete a regular Ret.P in the new color.***
Customized Pocket
Determine the width of your pocket
Step 1: With your sweater laying in front of you, measure approximately 3” inward from both sides and place a stitch markers
Step 2: Count how many stitches are in between your two stitch markers. This will be your starting chain number for your pocket.
Step 3: Take the number you got from step 2 and divide by 3.
_______/ 3 = _______
(starting Ch #) (# of decreases)
If your answer is an odd number, round down to the nearest even number. This number is the amount of decreases you will be making on the pocket.
Step 4: Subtract the even amount of decrease stitches from your original chain length. This will give you the number of stitches in the last row of the pocket.
______- ______= ______
(Starting Ch #) (# of Dec. St) (St in last row)
Step 5: Divide the Decrease Stitches in half to get the amount of decrease rows needed.
______/ 2 =______
(Dec St) (# of dec. rows)
Step 6: Once you have all the numbers, follow the color pattern for 30 rows, inserting decrease rows evenly throughout the middle rows of the pocket. Decrease rows are worked as follows: one decrease over the first 2 stitches & one decrease over the last 2 stitches.
Example: Starting Ch # is 50. Divide 50 by 3 which is 16.6. The number of decreases needed is 16. Then, subtract 16 from 50 to get 34, which is the amount of stitches in my last row. Next, divide decreases by 2 to get the number of decrease rows, 16/2 = 8. Work the pocket in color pattern spacing out 8 decrease rows. I would decrease on row 14, 16, 18, 20, 22, 24, 26 and 28.
Color Pattern
B, B, B, B, A, B, A, A, A, A, C, A, C, C, C, C, B, C. Repeat until your pocket has 30 rows.
Detailed Pocket
Find your panel width and follow the instructions in the color pattern, inserting decrease rows where indicated. Decrease rows are worked as follows: one decrease over the first 2 stitches & one decrease over the last 2 stitches.
50-59 stitches wide- Ch 44, and then decrease on row 15, 17, 19, 21, 23, 25, 27, for a total of 14 decreases. Finish off after row 30 which will be 30 stitches wide.
60-69 stitches wide- Ch 52, and then decrease on row 14, 16, 18, 20, 22, 24, 26, 28, for a total of 16 decreases. Finish off after row 30 which will be 36 stitches wide.
70-79 stitches wide- Ch 60, and then decrease on row 14, 15, 16, 17, 18, 19, 20, 21, 24, 28, for a total of 20 decreases. Finish off after row 30 which will be 40 stitches wide.
80-89 stitches wide- Ch 72, and then decrease on row 14, 15, 16, 17, 18, 19, 20, 21, 23, 24, 27, 28, for a total of 24 decreases. Finish off after row 30 which will be 48 stitches wide.
90-99 stitches wide- Ch 80, and then decrease on row 14, 15, 16, 17, 18, 19, 20, 21, 22, 23, 24, 27, 28, for a total of 26 decreases. Finish off after row 30 which will be 54 stitches wide.
100-109 stitches wide- Ch 90, and then decrease on row 14, 15, 16, 17, 18, 19, 20, 21, 22, 23, 24, 25, 26, 27, 28, for a total of 30 decreases. Finish off after row 30 which will be 60 stitches wide.
110-119 stitches wide- Ch 100, and then decrease on row 13, 14, 15, 16, 17, 18, 19, 20, 21, 22, 23, 24, 25, 26, 27, 28, for a total of 32 decreases. Finish off after row 30, which will be 68 stitches wide.
Finish off leaving a long tail to attach pocket to hoodie
Attaching Pocket
Step 1: First, find the middle of the front of your sweater, either by dividing your panel width in 2 or by folding the width of your panel. Then place a stitch marker to mark the center stitch.
Step 2: Next, find the center stitch of the top of your pocket, then place a stitch marker.
Step 3: Position the bottom of your pocket approximately .5” from the bottom hem of your panel.
Step 4: Align the center stitch of the pocket with the center stitch on your front panel, and then attach the pocket with your stitch marker to the panel.
Step 5: Then, place stitch markers on the corners of your pocket, attaching them to the panel for easier seaming.
Step 6: Begin to seam the pocket on to the panel using a whip stitch.


When you get to the corner, you will not be attaching the pocket to the sweater. Instead, you will do a running stitch down the inside edge of the pocket. When you get approximately 1.5” from the bottom of the pocket, you will begin attaching it to the sweater again.


Continue seaming across the bottom edge of the pocket and up approximately 1.5” on the other side of the pocket.
Finish off and weave in your ends.

And just like that you have finished your very own customized Baja hoodie! Give your self a pat on the back! You did Great!
Make sure to pin this pattern for later, and if you do make one tag me @Cactus.and.lace on Instagram and use the hashtag #CactusandlaceDesigns . I can’t wait to see your Baja Hoodie with the fun color combos you come up with, and I would love to share your pics! 🌵
Want to Check out more of my Patterns?


The Weekender Sweater// The Ivy Tee// The Summer Breeze Tank// The Quinn Cardi Vest