
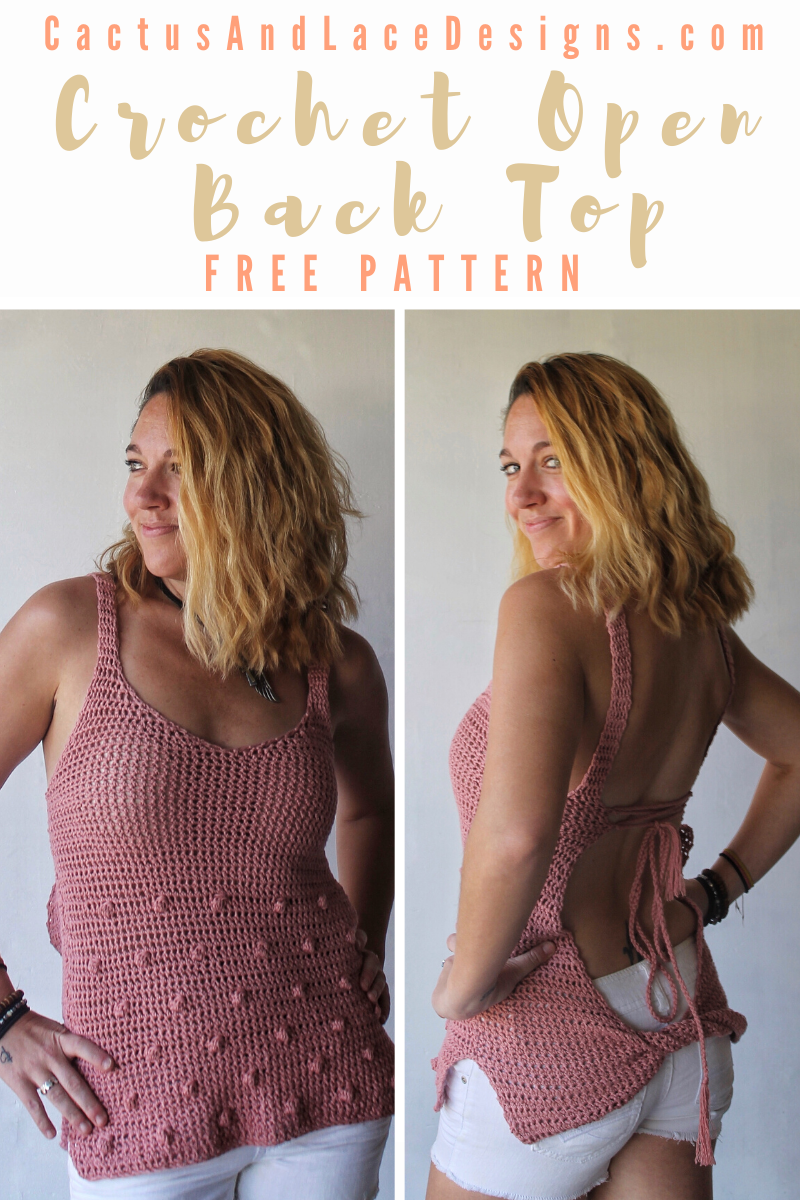
Crochet Open Back Top~The Rebel Tank~ Free Pattern

A quick and flirty Crochet Open Back top~ The Rebel Tank is a Free Pattern here on the blog.
Read through my inspiration and design process, scroll down for the Free Pattern or purchase the Full Color coded Printable PDF Here!

Inspiration + Design
Crochet tank tops are one of my absolute favorite things to design, as you can probably tell. So when I start a new tank design, I am always looking for new and unique ways to add that special touch to the design.
And this Crochet Open Back Top definitely has that special touch that we all look for when choosing our next wip.

The Rebel Tank is Born
When designing this Crochet Open Back Top, I was definitely pushed out of my comfort zone. A backless tank was something that has been in my mind for a while now, but I wasn’t sure how I could bring it to life.
I knew that I wanted it to be the perfect combination of fun and flirty, yet still look classy. So after about six separate attempts to get the design just right, The Rebel Tank was finally brought to life.
This easy tank is made in two separate panels and uses just two simple stitches. using two different stitches. The First one is the Extended Single Crochet Stitch, which is one of my new favorite stitches. And the second stitch is the Bobble Stitch!
If you aren’t familiar with those stitches, don’t worry, I will explain them below.

The Yarn
For this Crochet Open Back Top, I used Lion Brand Coboo Yarn. It is a blend of 51% Cotton and 49% Rayon from Bamboo!!! Coboo has been a huge hit this year and I can absolutely see why! The Bamboo gives the yarn an incredibly silky and smooth texture, which results in the most beautiful drape.
And the color palate for this yarn is absolutely perfect. They are all muted and more modern shades that can be paired so easily! My favorites are Mauve, Peach, Tan, Taupe, and Olive, but there are so many beautiful shades to choose from!
Shop For Coboo Yarn Here

Pattern
~Purchase the Color Coded Printable PDF Here.
~Save it to your Ravelry Here.

To Sum it up:
This Crochet Open Back Top is light weight and airy, therefore making it the perfect top for those hot summer days, or pair it with a cute jean jacket for the cooler evenings! Because it is made in two separate panels using simple stitches, this crochet open back top comes together in no time. Not only is this crochet top modern, fun and flirty, but it is also flattering on all sizes. Sizes range from XS-3X.

Yarn
~Lion Brand Coboo Yarn or appropriate Size 3 light weight yarn substitute.
Below is the approximate yardage for all sizes:
| Size | Xs | S | M | L | Xl | 2X | 3X |
| Approx Yds | 400- 450 | 450- 500 | 550- 600 | 600- 650 | 700- 750 | 800- 850 | 850- 900 |
Notions
-Stitch Markers
Gauge
13 Esc by 12 Esc rows = 4”x 4” square
Sizing
This Crochet garment is made to be close fitting, with very little positive ease. The measurements are actual bust measurements. If you would like your top to be looser fitting, then I would suggest going up a size.
| Size | Xs | S | M | L | Xl | 2X | 3X |
| Bust | 30” | 34” | 38” | 42” | 46” | 50” | 54” |
| Length | 25” | 25” | 26” | 27” | 28” | 28” | 28” |
Abbreviations Used
Ch- Chain
Yo- Yarn Over
Fsc- Foundation Single Crochet
Esc- Extended Single Crochet
Esc2tog- Extended Single Crochet two Together
Pattern Notes
-This Crochet Tank is worked in 2 separate panels from the bottom up and then seamed together.
-If you would like your tank longer or shorter, simply add or omit rows before the arm hole decreases where indicated.
-Ch 1 does NOT count as a stitch throughout.
Special Stitches
Extended Single Crochet– insert hook into stitch, draw up a loop. Yo, pull through one loop, then Yo and pull through remaining 2 loops.
Extended Single Crochet two Together– Insert hook into stitch, then draw up a loop. Insert hook into next stitch, then draw up a loop (3 loops on hook). Yo, pull through one loop, then Yo and pull through remaining 3 loops.


Bobble Stitch- Yo, insert hook into stitch, and draw up a loop (3 loops on hook), then Yo and pull through 2 loops. Yo, insert hook back into the same stitch and draw up a loop (4 loops on hook), then Yo and pull through 2 loops. Yo, insert hook back into the same stitch and draw up a loop (5 loops on hook), then Yo and pull through 2 loops. Yo, insert hook back into the same stitch and draw up a loop (6 loops on hook), then Yo and pull through all 6 loops.


The Rebel Tank
Instructions written Xs(S, M, L, Xl, 2X, 3X)
Front Panel
Row 1: Fsc 49(54, 62, 68, 75, 81, 88). Ch 1, Turn. [49(54, 62, 68, 75, 81, 88) Sc]
***If you are uncomfortable with the Fsc, you can Ch 50(55, 63, 69, 76, 82, 89) then Esc in the 2nd Ch from the hook and in each Ch across. Ch 1, Turn.[49(54, 62, 68, 75, 81, 88) Sc] ***
Row 2-5: Esc in the first St and in each St across. Ch 1, Turn. [49(54, 62, 68, 75, 81, 88)Esc]
Row 6: Esc in the first 6(6, 8, 8, 9, 10, 11) St, then Bobble next. Esc 6(7, 8, 9, 10, 11, 12), then Bobble next, Esc 6(7, 8, 9, 10, 11, 12), Bobble next. Esc 7(8, 8, 10, 11, 11, 12), then Bobble next. Esc 6(7, 8, 9, 10, 11, 12), then Bobble next. Esc 6(7, 8, 9, 10, 11, 12), then Bobble next. Esc in the last 6(6, 8, 8, 9, 10, 11). Ch 1, Turn. [43(48, 56, 62, 69, 75, 82)Esc, 6 Bobbles]
Row 7-11: Esc in the first St and each stitch across. Ch 1, Turn. [49(54, 62, 68, 75, 81, 88)Esc]
Row 12: Esc first 9(10, 12, 13, 14, 16, 17) St, then Bobble next. Esc 6(7, 8, 9, 10, 11, 12), then Bobble next. Esc 7(7, 8, 9, 11, 12, 12), then Bobble next. Esc 6(8, 8, 10, 10, 11, 12), Then Bobble next, Esc 6(7, 8, 9, 10, 11, 12), Bobble next. Esc in the last 10(10, 13, 13, 15, 16, 18). Ch 1, Turn. [44(49, 57, 63, 70, 76, 83)Esc, 5 Bobbles]
Rows 13-17: Repeat rows 7-11
Row 18: Repeat row 6
Rows 19-23: Repeat rows 7-11
Row 24: Repeat row 12
Rows 25-29: Repeat rows 7-11
Row 30: Repeat row 6
Rows 31-35: Repeat rows 7-11
Row 36: Repeat row 12
Rows 37-54: Esc in the first St and each St across. Ch 1, Turn. [49(54, 62, 68, 75, 81, 88)Esc]
***Tip: if you would like your top to be longer add more rows before you start your armhole decreases. Be sure to add the same amount of rows to the front and back panels.***
Arm Hole Decreases begin here.
Row 55: Esc2tog. 1 Esc in each St across until you get to the last 2 St. Esc2tog. Ch 1, Turn. [47(52, 60, 66, 73, 79, 86)Esc]
Row 56-59: Repeat row 55. [39(44, 52, 58, 65, 71, 78)Esc]
Neckline decreases start here, you will no longer be working across the entire row.
Row 60: Esc2tog, Esc 15(18, 22, 25, 28, 31, 35), Esc2tog. Ch 1, Turn. [17(20, 24, 27, 30, 33, 37)Esc]

Row 61: Esc2tog 2(2, 2, 2, 2, 3, 3) times, then Esc 13(16, 20, 23, 26, 27, 31). Ch 1, Turn. [15(18, 22, 25, 28, 30, 34)Esc]
Row 62: Esc 11(14, 18, 21, 24, 24, 28), then Esc2tog 2(2, 2, 2, 2, 3, 3) times. Ch 1, Turn. [13(16, 20, 23, 26, 27, 31)Esc]
Row 63: Esc2tog 2(2, 2, 2, 2, 2, 3) times, then Esc 9(12, 16, 19, 22, 23, 25). Ch 1, Turn. [11(14, 18, 21, 24, 25, 28)Esc]
Row 64: Esc 7(10, 14, 17, 20, 21, 22), then Esc2tog 2(2, 2, 2, 2, 2, 3) times. Ch 1, Turn. [9(12, 16, 19, 22, 23, 25)Esc]
Row 65: Esc2tog 2(2, 2, 2, 2, 2, 2) times, then Esc 5(8, 12, 15, 18, 19, 21). Ch 1, Turn. [7(10, 14, 17, 20, 21, 23)Esc]
Row 66: Esc 5(6, 10, 13, 16, 17, 19), then Esc2tog 1(2, 2, 2, 2, 2, 2) times. Ch 1, Turn. [6(8, 12, 15, 18, 19, 21)Esc]
Row 67: Esc2tog 1(2, 2, 2, 2, 2, 2) times, then Esc 4(4, 8, 11, 14, 15, 17). Ch 1, Turn. [5(6, 10, 13, 16, 17, 19)Esc]
Size XS Only
Row 68-76: Esc in each St across. Ch 1, Turn. [5 Esc]
Size S Only
Row 68: Esc 4, then Esc2tog. Ch 1, Turn. [5 Esc]
Row 69-76: Esc in each St across. Ch 1, Turn. [5 Esc]
All other sizes
M(L, Xl, 2X, 3X)
Row 68: Esc 6(9, 12, 13, 15), then Esc2tog 2(2, 2, 2, 2) times. Ch 1, Turn. [8(11, 14, 15, 17)Esc]
Row 69: Esc2tog 2(2, 2, 2, 2) times, then Esc 4(7, 10, 11, 13). Ch 1, Turn. [6(9, 12, 13, 15)Esc]
Size M Only
Row 70: Esc2tog, then Esc 4. Ch 1, Turn. [5 Esc]
Row 71-80: Esc in each St across. Ch 1, Turn. [5 Esc]
All other sizes
L(Xl, 2X, 3X)
Row 70: Esc 5(8, 9, 11), then Esc2tog 2(2, 2, 2) times. Ch 1, Turn. [7(10, 11, 13)Esc]
Row 71: Esc2tog, then Esc 5(8, 9, 11). Ch 1, Turn. [6(9, 10, 12)Esc]
Row 72: Esc 4(7, 8, 10), then Esc2tog. Ch 1, Turn. [5(8, 9, 11)Esc]
Size L only
Row 73-82: Esc in each St across. Ch 1, Turn. [5 Esc]
All other sizes
Xl(2X, 3X)
Row 73: Esc2tog, then Esc 6(7, 9). Ch 1, Turn. [7(8, 10)Esc]
Row 74: Esc 5(6, 8), then Esc2tog. Ch 1, Turn. [6(7, 9)Esc]
Row 75-84: Esc in each St across. Ch 1, Turn. [6(7, 9)Esc]
Finish Off

Opposite shoulder
Lay your panel in front of you with your finished shoulder on the left side. Join yarn with a Sl St in the Esc farthest to your right from row 59. Then Ch 1.

Repeat rows 60-76(76, 80, 82, 84, 84, 84) from the first shoulder piece.
Finish Off
Back Panel
Row 1: Fsc (49, 54, 62, 68, 75, 81, 88). Ch 1, Turn. [49(54, 62, 68, 75, 81, 88)Esc]
***If you are uncomfortable with the Fsc, you can Ch 50(55, 63, 69, 76, 82, 89), then Esc in the 2nd Ch from the hook and in each Ch across. Ch 1, Turn.[49(54, 62, 68, 75, 81, 88)Sc] ***
Row 2-20: Esc in the first St and each St across. Ch 1, Turn. [49(54, 62, 68, 75, 81, 88)Esc]
Back Straps begin here. We will no longer be working across the entire row.
Row 21: Esc in the first (20, 22, 26, 29, 32, 35, 38) St. Ch 1, Turn. [20(22, 26, 29, 32, 35, 38)Esc]
Row 22: Esc2tog, then Esc in each St across. Ch 1, Turn. [19(21, 25, 28, 31, 34, 37)Esc]
Row 23: Esc in each St across. Ch 1, Turn. [19(21, 25, 28, 31, 34, 37)Esc]
Row 24-50(54, 62, 68, 72, 76, 76): Repeat rows 22 and 23. At the end of row 50(54, 62, 68, 72, 76, 76) you will have [5(5, 5, 5, 6, 7, 9)Esc]
Row 51(55, 63, 69, 73, 77, 77)- 76(76, 80, 82, 84, 84, 84): Esc in each St across. Ch 1, Turn. [5(5, 5, 5, 6, 7, 9)Esc]
Finish off
Opposite Strap
Lay your panel in front of you with your finished shoulder on the left side. Join yarn with a Sl St in the Esc farthest to your right from row 20. Then Ch 1.
Repeat rows 21-76(76, 80, 82, 84, 84, 84) from the first shoulder piece.
Finish Off
Construction
Lay your panels on top of one another with right sides facing each other, and the back of the top facing up. If you want to create the “twist” in the back, bring the right hand bottom corner up and then under your back panel. You will now see a twist in the middle of your back panel.
Then, using your yarn needle and the yarn tail, seam the shoulders together using the mattress stitch.
Once you have your shoulders seamed, cut a piece of yarn about 3 times as long as your side seam. Place a stitch marker on your top marking where you want your seam to stop and your armholes to start. You will be seaming from the armhole down towards the bottom.


Back Tie
The first thing you need to do is decide how long you would like your finished tie to be. My Tie is approximately 75” long.
Once you have your length, divide that number by 3.
75/3= 25
Take that answer and add it to your desired length.
75+25= 100
Cut 3 pieces of yarn this length, and braid it.
Once braided, lace your braid through the back of the tank in a zig zag pattern. I laced my braid through row 55 (where the arm hole decreases begin) and then also through row 50.

Tie off, tuck in those ends and enjoy your new Rebel Tank
Make sure to pin this pattern for later, and if you do make one tag me @Cactus.and.lace on Instagram and use the hashtag #CactusandlaceDesigns . I can’t wait to see your Rebel Tanks, and I would love to share your pics! 🌵
Other Free Crochet Patterns You Might Love


The Kahe Kai Top// The Wren Tank// The Wren Tee// The Aria Tank
Comments are closed.
Charming Crochet Tops for Summer with Free Patterns
August 6, 2020 at 10:01 am[…] The Rebel Tank […]