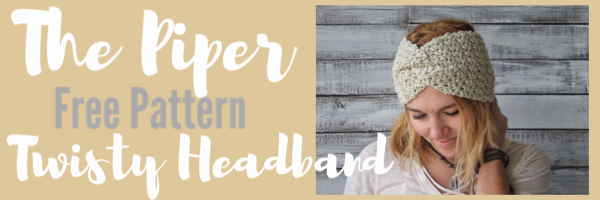
How to Crochet the Piper Twisty Headband
Can y’all believe we are almost half way through the first month of 2020 already? I mean where does time even go? But just because we’re already on the back end of winter doesn’t mean that we don’t have plenty of cold weather ahead of us!
This headband design has been on my mind for quite sometime now, and I am finally releasing it out to the world!
Say Hello to the Piper Twisty Headband!

This headband is made up of a very simple, yet unique stitch called the Glover Stitch. I am pretty obsessed with it to say the least.
I will explain how to make the Glover Stitch below, however if you need more detail, check out this photo tutorial.
You can also find the PDF version Here, which includes full photo tutorials, color coded sizes for ease of use, as well as instructions to make this headband in Bulky weight yarn!
So, lets get to the fun part!
Finished Sizes
Adult Size fits 22”-23” – measures approxImately 5.5” wide by 17.5” long
Child Size fits 20”-21”- measures approximately 4.5”-4.75” wide by 16” long
Toddler Size fits 18”-19” -measures approximately 3” wide by 15” long
Materials
-Size I (5.5 mm) Hook
-Category 4 Worsted weight yarn
-Yarn needle
Gauge
14 ST and 10 rows in Glover ST= 4”
Abbreviations Used
CH- Chain
YO- Yarn Over
ST- Stitch
FLO- Front Loop Only
Pattern Notes
-This headband is worked in a long rectangle, then folded in half and the ends are stitched together to create the twist.
-Size Instructions in pattern will be (Adult, Child, Toddler)
–Tip: make sure to do your chain stitches loosely to make it easier to work into the front loops.
–Tip: For a customized fit, wrap the band around your head before fastening off to make sure the band fits snugly around your head.
Special Stitches
Glover Stitch- insert hook into the FLO of the next stitch, draw up a loop (2 loops on hook). YO, insert hook into the next stitch, draw up a loop (4 loops on hook). YO, pull through all loops then CH 1.
If you need a full photo tutorial look here.
Pattern
Row 1: CH (21, 17, 11), insert hook into the 2nd CH from the hook, draw up a loop. *YO, insert hook into the next CH, draw up a loop (4 loops on hook). YO, pull through all loops, then CH 1. Insert hook into the the next CH, draw up a loop.* Repeat from * * across. CH 2, Turn.
Row 2: Insert hook into the 2nd CH from hook in the FLO, draw up a loop. *YO, insert hook into both loops of the next ST, draw up a loop (4 loops on hook). YO, pull through all loops, then CH 1. Insert hook into the FLO of the next ST.” Repeat from * * across. CH 2, Turn.


Row 3: Repeat row 2 until your band measures (17.5”, 16”, 15”). Or for a total of (44, 40, 38) rows.
Finish off leaving a long tail to sew the ends together & create the twist.
Creating the Twist
With your rectangle laying flat in front of you, fold the band in half lengthwise with the right sides facing each other.

Each of the folded ends now makes a “V” shape. Next, take each of those “V”s and interlock them together, lining up all 4 layers in a zig zag pattern.


Then, taking your yarn needle and your long tail, sew through all 4 layers in a zig zag motion.


Once you have secured the ends together, tie off and turn your headband right side out.

You are now the proud maker of your very own Piper Twisty Headband! I hope you love it and enjoy making them as much as I do!
Don’t forget to tag me @cactus.and.lace on your pictures of your Piper Headbands, so I can see & share your work!

Lastly, if Headbands/ EarWarmers are your jam, check out my other patterns!


PATTERN COPYRIGHT
Please do not copy, redistribute, or sell my pattern in any way. I hope you enjoy your finished Twisty Turban. If you choose to sell the finished product, please credit me, Ashley Cobb of Cactus & Lace Designs and provide a link to
www.etsy.com/shop/cactusandlacedesigns in your listings, so that other makers can find me as well. Thank you for understanding.
If you do post any pictures of your finished product, I would love to see them!!! Use #cactusandlacedesigns and tag me @cactus.and.lace on instagram so I can see, and so other makers can find the pattern.


